SpringMVC+FastJson+Swagger集成的完整實例教程
基礎部分
成都創新互聯服務項目包括新余網站建設、新余網站制作、新余網頁制作以及新余網絡營銷策劃等。多年來,我們專注于互聯網行業,利用自身積累的技術優勢、行業經驗、深度合作伙伴關系等,向廣大中小型企業、政府機構等提供互聯網行業的解決方案,新余網站推廣取得了明顯的社會效益與經濟效益。目前,我們服務的客戶以成都為中心已經輻射到新余省份的部分城市,未來相信會繼續擴大服務區域并繼續獲得客戶的支持與信任!
1. FastJson 簡介
Fastjson是一個Java庫,可用于將Java對象轉換為JSON表示。它也可以被用來將一個JSON字符串轉換成一個等效的Java對象。在轉換速度上應該是最快的,幾乎成為了項目的標配(在ajax請求和接口開發時一般都會用fastjson而不再使用jackson)。
GitHub: https://github.com/alibaba/fastjson (本地下載)
特性:
- 在服務器端和android客戶端提供最佳性能
- 提供簡單toJSONString()和parseObject()方法的Java對象轉換為JSON,反之亦然
- 允許存在的無法改變的對象轉換為從JSON
- Java泛型的廣泛支持
- 允許自定義表示對象
- 支持任意復雜的對象(深繼承層次結構和廣泛使用泛型類型)
主要特點:
- 快速FAST (比其它任何基于Java的解析器和生成器更快,包括jackson)
- 強大(支持普通JDK類包括任意Java Bean Class、Collection、Map、Date或enum)
- 零依賴(沒有依賴其它任何類庫除了JDK)
- 支持注解
2. fastjson api
Fastjson API入口類是com.alibaba.fastjson.JSON,常用的序列化操作都可以在JSON類上的靜態方法直接完成。
// 把JSON文本parse為JSONObject或者JSONArray
public static final Object parse(String text);

// 把JSON文本parse成JSONObject
public static final JSONObject parseObject(String text);

// 把JSON文本parse為JavaBean
public static final <T> T parseObject(String text, Class<T> clazz);

// 把JSON文本parse成JSONArray
public static final JSONArray parseArray(String text);

// 把JSON文本parse成JavaBean集合
public static final <T> List<T> parseArray(String text, Class<T> clazz);

// 將JavaBean序列化為JSON文本
public static final String toJSONString(Object object);

// 將JavaBean序列化為帶格式的JSON文本
public static final String toJSONString(Object object, boolean prettyFormat);

// 將JavaBean轉換為JSONObject或者JSONArray
public static final Object toJSON(Object javaObject);
JSONArray:相當于List<Object>
JSONObject:相當于Map<String, Object>
SerializeConfig: 是對序列化過程中一些序列化過程的特殊配置, 如對一些字段進行格式處理(日期、枚舉等)
SerializeWriter:相當于StringBuffer
SerializerFeature屬性 :
- QuoteFieldNames 輸出key時是否使用雙引號,默認為true
- UseSingleQuotes 使用單引號而不是雙引號,默認為false
- WriteMapNullValue 是否輸出值為null的字段,默認為false
- WriteEnumUsingToString Enum輸出name()或者original,默認為false
- UseISO8601DateFormat Date使用ISO8601格式輸出,默認為false
- WriteNullListAsEmpty List字段如果為null,輸出為[],而非null
- WriteNullStringAsEmpty 字符類型字段如果為null,輸出為”“,而非null
- WriteNullNumberAsZero 數值字段如果為null,輸出為0,而非null
- WriteNullBooleanAsFalse Boolean字段如果為null,輸出為false,而非null
- SkipTransientField 如果是true,類中的Get方法對應的Field是transient,序列化時將會被忽略。默認為true
- SortField 按字段名稱排序后輸出。默認為false
- WriteTabAsSpecial 把\t做轉義輸出,默認為false 不推薦
- PrettyFormat 結果是否格式化,默認為false
- WriteClassName 序列化時寫入類型信息,默認為false。反序列化是需用到
- DisableCircularReferenceDetect 消除對同一對象循環引用的問題,默認為false
- WriteSlashAsSpecial 對斜杠'/'進行轉義
- BrowserCompatible 將中文都會序列化為\uXXXX格式,字節數會多一些,但是能兼容IE 6,默認為false
- WriteDateUseDateFormat 全局修改日期格式,默認為false。JSON.DEFFAULT_DATE_FORMAT = “yyyy-MM-dd”;JSON.toJSONString(obj, SerializerFeature.WriteDateUseDateFormat);
- DisableCheckSpecialChar 一個對象的字符串屬性中如果有特殊字符如雙引號,將會在轉成json時帶有反斜杠轉移符。如果不需要轉義,可以使用這個屬性。默認為false
- NotWriteRootClassName 含義
- BeanToArray 將對象轉為array輸出
- WriteNonStringKeyAsString
- NotWriteDefaultValue
- BrowserSecure
- IgnoreNonFieldGetter
- WriteEnumUsingName
實戰部分
1、pom.xml 中引入spring mvc、 fastjson 依賴
<project xmlns="http://maven.apache.org/POM/4.0.0" xmlns:xsi="http://www.w3.org/2001/XMLSchema-instance"
 xsi:schemaLocation="http://maven.apache.org/POM/4.0.0 http://maven.apache.org/maven-v4_0_0.xsd">
 <modelVersion>4.0.0</modelVersion>
 <groupId>com.mengdee</groupId>
 <artifactId>platform-springmvc-webapp</artifactId>
 <packaging>war</packaging>
 <version>0.0.1-SNAPSHOT</version>
 <name>platform-springmvc-webapp Maven Webapp</name>
 <url>http://maven.apache.org</url>

 <properties>
 <project.build.sourceEncoding>UTF-8</project.build.sourceEncoding>
 <junit.version>3.8.1</junit.version>
 <log4j.version>2.5</log4j.version>
 <jstl.version>1.2</jstl.version>
 <spring.version>4.2.3.RELEASE</spring.version>
 <fastjson.version>1.2.32</fastjson.version>

 </properties>

 <dependencies>
 <dependency>
 <groupId>junit</groupId>
 <artifactId>junit</artifactId>
 <version>3.8.1</version>
 <scope>test</scope>
 </dependency>

 <dependency>
 <groupId>javax.servlet</groupId>
 <artifactId>jstl</artifactId>
 <version>${jstl.version}</version>
 </dependency>

 <!-- springframework -->
 <dependency>
 <groupId>org.springframework</groupId>
 <artifactId>spring-webmvc</artifactId>
 <version>${spring.version}</version>
 </dependency>
 <dependency>
 <groupId>org.springframework</groupId>
 <artifactId>spring-core</artifactId>
 <version>${spring.version}</version>
 </dependency>
 <dependency>
 <groupId>org.springframework</groupId>
 <artifactId>spring-context</artifactId>
 <version>${spring.version}</version>
 </dependency>
 <dependency>
 <groupId>org.springframework</groupId>
 <artifactId>spring-context-support</artifactId>
 <version>${spring.version}</version>
 </dependency>
 <dependency>
 <groupId>org.springframework</groupId>
 <artifactId>spring-jdbc</artifactId>
 <version>${spring.version}</version>
 </dependency>

 <dependency>
 <groupId>com.alibaba</groupId>
 <artifactId>fastjson</artifactId>
 <version>${fastjson.version}</version>
 </dependency>

 </dependencies>

 <!-- 使用aliyun鏡像 -->
 <repositories>
 <repository>
 <id>aliyun</id>
 <name>aliyun</name>
 <url>http://maven.aliyun.com/nexus/content/groups/public</url>
 </repository>
 </repositories>

 <build>
 <finalName>platform-springmvc-webapp</finalName>
 </build>
</project>
2、 配置web.xml
<!DOCTYPE web-app PUBLIC
 "-//Sun Microsystems, Inc.//DTD Web Application 2.3//EN"
 "http://java.sun.com/dtd/web-app_2_3.dtd" >

<web-app>
 <display-name>Archetype Created Web Application</display-name>
 <context-param>
 <param-name>contextConfigLocation</param-name>
 <param-value>classpath:conf/spring/spring-*.xml</param-value>
 </context-param>

 <listener>
 <description>Spring監聽器</description>
 <listener-class>org.springframework.web.context.ContextLoaderListener</listener-class>
 </listener>

 <servlet>
 <servlet-name>spring-mvc</servlet-name>
 <servlet-class>org.springframework.web.servlet.DispatcherServlet</servlet-class>
 <init-param>
 <param-name>contextConfigLocation</param-name>
 <param-value>/WEB-INF/spring-servlet.xml</param-value>
 </init-param>
 <load-on-startup>1</load-on-startup>
 </servlet>
 <servlet-mapping>
 <servlet-name>spring-mvc</servlet-name>
 <url-pattern>/</url-pattern>
 </servlet-mapping>

 <filter>
 <filter-name>characterEncodingFilter</filter-name>
 <filter-class>org.springframework.web.filter.CharacterEncodingFilter</filter-class>
 <init-param>
 <param-name>encoding</param-name>
 <param-value>UTF-8</param-value>
 </init-param>
 <init-param>
 <param-name>forceEncoding</param-name>
 <param-value>true</param-value>
 </init-param>
 </filter>
 <filter-mapping>
 <filter-name>characterEncodingFilter</filter-name>
 <url-pattern>/*</url-pattern>
 </filter-mapping>


 <welcome-file-list>
 <welcome-file>/index.jsp</welcome-file>
 </welcome-file-list>

 <error-page>
 <error-code>404</error-code>
 <location>/index.jsp</location>
 </error-page>
</web-app>
3、 配置spring-servlet.xml
<?xml version="1.0" encoding="UTF-8"?>
<beans xmlns="http://www.springframework.org/schema/beans"
 xmlns:xsi="http://www.w3.org/2001/XMLSchema-instance"
 xmlns:p="http://www.springframework.org/schema/p"
 xmlns:context="http://www.springframework.org/schema/context"
 xmlns:mvc="http://www.springframework.org/schema/mvc"
 xsi:schemaLocation="http://www.springframework.org/schema/beans
 http://www.springframework.org/schema/beans/spring-beans-4.2.xsd
 http://www.springframework.org/schema/mvc
 http://www.springframework.org/schema/mvc/spring-mvc-4.2.xsd
 http://www.springframework.org/schema/context
 http://www.springframework.org/schema/context/spring-context-4.2.xsd">

 <context:component-scan base-package="com.mengdee.manage.controller" />

 <bean id="ViewResolver" class="org.springframework.web.servlet.view.InternalResourceViewResolver">
 <property name="prefix" value="/"></property> <!-- 視圖文件的前綴 -->
 <property name="suffix" value=".jsp"></property> <!-- 視圖文件的后綴名 -->
 <!-- view是用什么顯示,這里是jsp,還可以用velocity之類的 -->
 <property name="viewClass" value="org.springframework.web.servlet.view.JstlView"></property>
 </bean>

 <!-- 啟動Spring MVC的注解功能,完成請求和注解POJO的映射 -->
 <mvc:annotation-driven>
 <mvc:message-converters register-defaults="true">
 <!-- 配置Fastjson 替換原來的jackson支持 -->
 <bean class="com.alibaba.fastjson.support.spring.FastJsonHttpMessageConverter">
 <property name="supportedMediaTypes">
 <list>
 <value>text/html;charset=UTF-8</value>
 <value>application/json</value>
 </list>
 </property>
 <property name="features">
 <list>

 <value>QuoteFieldNames</value> <!-- 輸出key時是否使用雙引號,默認為true -->
 <value>WriteMapNullValue</value> <!-- 是否輸出值為null的字段,默認為false -->

 <!--
 <value>DisableCircularReferenceDetect</value>
 <value>WriteDateUseDateFormat</value>
 <value>WriteNullStringAsEmpty</value> 字符類型字段如果為null,輸出為"",而非null
 <value>WriteNullNumberAsZero</value> 數值字段如果為null,輸出為0,而非null
 <value>WriteNullBooleanAsFalse</value> Boolean字段如果為null,輸出為false,而非null
 <value>WriteNullListAsEmpty</value> List字段如果為null,輸出為[],而非null
 -->

 </list>
 </property>
 </bean>
 </mvc:message-converters>
 </mvc:annotation-driven>
</beans>
4、Java
Education:學歷(枚舉類)
package com.mengdee.manage.entity;
import java.util.HashMap;
import java.util.Map;
/**
 * 學歷
 * @author Administrator
 *
 */
public enum Education {
 KINDERGARTEN("幼兒園", 1),
 ELEMENTARY("小學", 2),
 JUNIOR_MIDDLE("初級中學", 3),
 SENIOR_MIDDLE("高級中學", 4),
 UNIVERSITY("大學", 5),
 COLLEGE("學院", 6);
 private static final Map<Integer, Education> EDUCATION_MAP = new HashMap<Integer, Education>();
 static {
 for (Education education : Education.values()) {
 EDUCATION_MAP.put(education.getIndex(), education);
 }
 }

 private String text;
 private int index;

 private Education(String text, int index) {
 this.text = text;
 this.index = index;
 }


 public String getText() {
 return text;
 }

 public void setText(String text) {
 this.text = text;
 }

 public int getIndex() {
 return index;
 }

 public void setIndex(int index) {
 this.index = index;
 }


 public static Education getEnum(Integer index) {
 return EDUCATION_MAP.get(index);
 }
}
Person:
package com.mengdee.manage.entity;
import java.util.ArrayList;
import java.util.Date;
import java.util.List;
import java.util.Map;
import com.alibaba.fastjson.annotation.JSONField;
public class Person {

 private Long id;
 private String name;

 private byte gender; // 性別 1:男 2:女
 private short age; // 年齡
 private long salary; // 薪水
 private double weight; // 體重
 private char level; // 評級

 private boolean adult; // 是否成年人
 private Date birthday; // 生日
 private Education education;// 學歷

 private String[] hobbies; // 愛好
 private List<Dog> dogs; // 寵物狗
 private Map<String, Object> address; // 住址

 // 使用注解控制是否要序列化
 @JSONField(serialize = false)
 private List<Object> obj = new ArrayList<>();

 public Person() {

 }
 public Person(Long id, String name, byte gender, short age, long salary, double weight, char level, boolean adult,
 Date birthday, String[] hobbies, List<Dog> dogs, Map<String, Object> address) {
 super();
 this.id = id;
 this.name = name;
 this.gender = gender;
 this.age = age;
 this.salary = salary;
 this.weight = weight;
 this.level = level;
 this.adult = adult;
 this.birthday = birthday;
 this.hobbies = hobbies;
 this.dogs = dogs;
 this.address = address;
 }


 public Long getId() {
 return id;
 }
 public void setId(Long id) {
 this.id = id;
 }
 public String getName() {
 return name;
 }
 public void setName(String name) {
 this.name = name;
 }
 public byte getGender() {
 return gender;
 }
 public void setGender(byte gender) {
 this.gender = gender;
 }
 public short getAge() {
 return age;
 }
 public void setAge(short age) {
 this.age = age;
 }
 public long getSalary() {
 return salary;
 }
 public void setSalary(long salary) {
 this.salary = salary;
 }
 public double getWeight() {
 return weight;
 }
 public void setWeight(double weight) {
 this.weight = weight;
 }
 public char getLevel() {
 return level;
 }
 public void setLevel(char level) {
 this.level = level;
 }
 public boolean isAdult() {
 return adult;
 }
 public void setAdult(boolean adult) {
 this.adult = adult;
 }
 public Date getBirthday() {
 return birthday;
 }
 public void setBirthday(Date birthday) {
 this.birthday = birthday;
 }

 // 處理序列化枚舉類型,默認的值是序列化枚舉值字符串,而不是枚舉綁定的索引或者文本
 @JSONField(name = "edu")
 public int getEdu(){
 return education.getIndex();
 }

 @JSONField(name = "edu")
 public void setEdu(int index){
 this.education = Education.getEnum(index);
 }

 @JSONField(serialize = false)
 public Education getEducation() {
 return education;
 }

 @JSONField(serialize = false)
 public void setEducation(Education education) {
 this.education = education;
 }


 public String[] getHobbies() {
 return hobbies;
 }
 public void setHobbies(String[] hobbies) {
 this.hobbies = hobbies;
 }
 public List<Dog> getDogs() {
 return dogs;
 }
 public void setDogs(List<Dog> dogs) {
 this.dogs = dogs;
 }
 public Map<String, Object> getAddress() {
 return address;
 }
 public void setAddress(Map<String, Object> address) {
 this.address = address;
 }
}
TestController
package com.mengdee.manage.controller;

import java.text.DecimalFormat;
import java.util.ArrayList;
import java.util.Date;
import java.util.HashMap;
import java.util.List;
import java.util.Map;

import org.springframework.stereotype.Controller;
import org.springframework.web.bind.annotation.RequestMapping;
import org.springframework.web.bind.annotation.ResponseBody;

import com.alibaba.fastjson.JSON;
import com.alibaba.fastjson.JSONArray;
import com.alibaba.fastjson.serializer.DoubleSerializer;
import com.alibaba.fastjson.serializer.SerializeConfig;
import com.alibaba.fastjson.serializer.SimpleDateFormatSerializer;
import com.mengdee.manage.entity.Address;
import com.mengdee.manage.entity.Dog;
import com.mengdee.manage.entity.Education;
import com.mengdee.manage.entity.Person;

@Controller
public class TestController {
 private static SerializeConfig serializeConfig = new SerializeConfig();
 static {
 serializeConfig.put(Date.class, new SimpleDateFormatSerializer("yyyy-MM-dd HH:mm:ss"));
 serializeConfig.put(Double.class, new DoubleSerializer(new DecimalFormat("0.00")));
 }


 @RequestMapping("/index")
 public String index(){
 return "index";
 }


 // javabean to object
 @RequestMapping("/json")
 @ResponseBody
 public Object json(){
 Person person = new Person();
 person.setId(1L);
 person.setName("mengdee");
 person.setAge((short) 18);

 //
 /*
 {
 "birthday": null,
 "weight": 0,
 "dogs": null,
 "adult": false,
 "hobbies": null,
 "education": null,
 "id": 1,
 "level": "",
 "address": null,
 "age": 18,
 "name": "mengdee",
 "gender": 0,
 "salary": 0
 }
 */
 Object personJson = JSON.toJSON(person);
 return personJson;
 }

 // javabean to string
 @RequestMapping("/json2")
 @ResponseBody
 public String json2(){
 Person person = new Person();
 person.setId(1L);
 person.setName("mengdee");
 person.setAge((short) 18);

 // 使用該方式值為null的經測試不出來,已經配置了<value>WriteMapNullValue</value>
// "{"adult":false,"age":18,"gender":0,"id":1,"level":"","name":"mengdee","salary":0,"weight":0.0}"
 String jsonString = JSON.toJSONString(person);
 return jsonString;
 }

 @RequestMapping("/json3")
 @ResponseBody
 public Object json3(){
 Person person = new Person();
 person.setId(1L);
 person.setName("mengdee");
 person.setAge((short) 18);
 person.setBirthday(new Date());

 Object personJson = JSON.toJSON(person); // JSON.toJSON(person)默認是毫秒數"birthday":1495073314780,

// 使用serializeConfig序列號配置對日期格式化
// "{"birthday":"2017-05-18 10:19:55","weight":0.0,"adult":false,"id":1,"level":"","age":18,"name":"mengdee","gender":0,"salary":0}"
 String jsonString = JSON.toJSONString(personJson, serializeConfig);
 return jsonString;
 }


 @RequestMapping("/json4")
 @ResponseBody
 public Object json4(){
 Person person = new Person();
 person.setId(1L);
 person.setName("mengdee");
 person.setAge((short) 18);
 person.setBirthday(new Date());
 person.setEducation(Education.UNIVERSITY); // 枚舉

 String[] hobbies = {"讀書", "旅游"};
 person.setHobbies(hobbies);

 Dog dog1 = new Dog(1L, "dog1", (short)1);
 Dog dog2 = new Dog(2L, "dog2", (short)2);
 List<Dog> dogs = new ArrayList<>();
 dogs.add(dog1);
 dogs.add(dog2);
 person.setDogs(dogs);

 Address address1 = new Address(1l, "上海浦東新區");
 Address address2 = new Address(2l, "上海寶山區");
 Map<String, Object> addressMap = new HashMap<>();
 addressMap.put(address1.getId() + "", address1);
 addressMap.put(address2.getId() + "", address2);
 person.setAddress(addressMap);


 Object personJson = JSON.toJSON(person);

 return personJson;
 }

 @RequestMapping("/json5")
 @ResponseBody
 public String json5(){
 Dog dog1 = new Dog(1L, "dog1", (short)1);
 Dog dog2 = new Dog(2L, "dog2", (short)2);
 List<Dog> dogs = new ArrayList<>();
 dogs.add(dog1);
 dogs.add(dog2);

 // List<T> -> JSON
 String jsonString = JSON.toJSONString(dogs, false);
 System.out.println(jsonString);

 // JSON -> List<T>
 List<Dog> parseArray = JSON.parseArray(jsonString, Dog.class);
 for (Dog dog : parseArray) {
 System.out.println(dog);
 }

 Map<String,Dog> map = new HashMap<String, Dog>();
 map.put("dog1",new Dog(1L, "dog1", (short)1));
 map.put("dog2",new Dog(2L, "dog2", (short)2));
 map.put("dog3",new Dog(3L, "dog3", (short)3));

 // Map -> JSON
 String mapJsonString = JSON.toJSONString(map,true);
 System.out.println(mapJsonString);

 // JSON -> Map
 @SuppressWarnings("unchecked")
 Map<String,Dog> map1 = (Map<String,Dog>)JSON.parse(mapJsonString);
 for (String key : map1.keySet()) {
 System.out.println(key + ":" + map1.get(key));
 }

 // Array -> JSON
 String[] hobbies = {"a","b","c"};
 String hobbiesString = JSON.toJSONString(hobbies,true);
 System.out.println(hobbies);

 // JSON -> Array
 JSONArray jsonArray = JSON.parseArray(hobbiesString);
 for (Object o : jsonArray) {
 System.out.println(o);
 }
 System.out.println(jsonArray);
 return jsonString;
 }
}
Swagger集成
第一步:引入相關依賴
<dependency>
 <groupId>io.springfox</groupId>
 <artifactId>springfox-swagger2</artifactId>
 <version>2.6.1</version>
 <scope>compile</scope>
</dependency>
<dependency>
 <groupId>com.fasterxml.jackson.core</groupId>
 <artifactId>jackson-databind</artifactId>
 <version>2.6.6</version>
</dependency>
第二步:Swagger信息配置
SwaggerConfig.java
@Configuration
@EnableWebMvc
@EnableSwagger2
public class SwaggerConfig {
 @Bean
 public Docket customDocket() {
 Docket docket = new Docket(DocumentationType.SWAGGER_2);
 docket.apiInfo(apiInfo());
 docket.select().apis(RequestHandlerSelectors.withMethodAnnotation(ApiOperation.class));
 docket.select().paths(PathSelectors.regex("/api/.*")).build();

 return docket;
 }

 private ApiInfo apiInfo() {
 Contact contact = new Contact("小明", "http://www.baidu.com", "baidu@163.com");
 return new ApiInfo("API接口", //大標題 title
 "API接口", //小標題
 "0.0.1", //版本
 "www.baidu.com",//termsOfServiceUrl
 contact,//作者
 "API接口",//鏈接顯示文字
 "http://www.baidu.com"http://網站鏈接
 );
 }
}注意:因SwaggerConfig這個類配置了注解,所以這個類必須被掃描到,即該類一定包含在context:component-scan中。
第三步:在類、方法、參數上使用注解
@Controller
@RequestMapping("/api/v1")
@Api(description = "API接口")
public class ApiController {
 @ApiOperation(value = "用戶登錄", notes = "用戶登錄接口")
 @ApiResponses({
 @ApiResponse(code = 0, message = "success"),
 @ApiResponse(code = 10001, message = "用戶名錯誤", response = IllegalArgumentException.class),
 @ApiResponse(code = 10002, message = "密碼錯誤")
 })
 @RequestMapping(value = "/user/login", method = RequestMethod.POST, produces = {"application/json;charset=UTF-8;"})
 @ResponseBody
 public String login(@ApiParam(name = "username", value = "用戶名", required = true) @RequestParam String username,
  @ApiParam(name = "password", value = "密碼", required = true) @RequestParam String password){
 return "{'username':'" + username + "', 'password':'" + password + "'}";
 }


 @ApiImplicitParams({
 @ApiImplicitParam(paramType = "header", name = "phone", dataType = "String", required = true, value = "手機號"),
 @ApiImplicitParam(paramType = "query", name = "nickname", dataType = "String", required = true, value = "nickname", defaultValue = "雙擊666"),
 @ApiImplicitParam(paramType = "path", name = "platform", dataType = "String", required = true, value = "平臺", defaultValue = "PC"),
 @ApiImplicitParam(paramType = "body", name = "password", dataType = "String", required = true, value = "密碼")
 })
 @RequestMapping(value = "/{platform}/user/regist", method = RequestMethod.POST, produces = {"application/json;charset=UTF-8;"})
 @ResponseBody
 public String regist(@RequestHeader String phone, @RequestParam String nickname, @PathVariable String platform, @RequestBody String password){
 return "{'username':'" + phone + "', 'nickname':'" + nickname + "', 'platform': '" + platform + "', 'password':'"+password+"'}";
 }

 @RequestMapping(value = "/user/list", method = RequestMethod.GET, produces = {"application/json;charset=UTF-8;"})
 @ResponseBody
 public String getUserList(Pager pager){
 return "[{'id': "+pager.getPage()+", 'username': 'zhangsan"+pager.getSize()+"'}]";
 }

 @RequestMapping("/docs")
 @ApiIgnore
 public String test(){
 return "api-docs";
 }
}
Pager
public class Pager {
 @ApiModelProperty(value = "頁碼", required = true)
 private int page;
 @ApiModelProperty(value = "每頁條數", required = true)
 private int size;

 public Pager() {
 }

 public int getPage() {
 return page;
 }

 public void setPage(int page) {
 this.page = page;
 }

 public int getSize() {
 return size;
 }

 public void setSize(int size) {
 this.size = size;
 }
}
常用注解:
- @Api(description = “接口類的描述”)
- @ApiOperation(value = “接口方法的名稱”, notes = “備注說明”)
- @ApiParam(name = “參數名稱”, value = “備注說明”, required = 是否必須):標注在方法的參數上 用于描述參數的名稱、備注、是否必須等信息
- @ApiImplicitParam(paramType = “query”, name = “password”, dataType = “String”, required = true, value = “密碼”, defaultValue = “123456”)用于描述方法的參數,標注在方法上,和@ApiParam功能一樣,只是標注的位置不同而已
.paramType:參數類型,即參數放在哪個地方
. header–>請求參數的獲取:@RequestHeader,參數放在請求頭
. query–>請求參數的獲取:@RequestParam,參數追加在url后面
. path(用于restful接口)–>請求參數的獲取:@PathVariable
. body 使用@RequestBody接收數據 POST有效,參數放在請求體中
. form
.name:參數名
.dataType:參數的數據類型
.required:參數是否必須傳
.value:參數的描述
.defaultValue:參數的默認值 - @ApiImplicitParams: 用于包含多個@ApiImplicitParam
- @ApiResponse(code = 0, message = “success”),
.code:響應碼,例如400
.message:信息,一般是對code的描述
.response:拋出異常的類 - @ApiModel:描述一個Model的信息(這種一般用在post創建的時候,使用@RequestBody這樣的場景,請求參數無法使用@ApiImplicitParam注解進行描述的時候)
.@ApiModelProperty:描述一個model的屬性
. position 允許在模型中顯式地排序屬性。
. value 參數名稱
. required 是否必須 boolean
. hidden 是否隱藏 boolean
. allowableValues = “range[0, 1]” 一般用于指定參數的合法值 - @ApiIgnore:用于或略該接口,不生成該接口的文檔
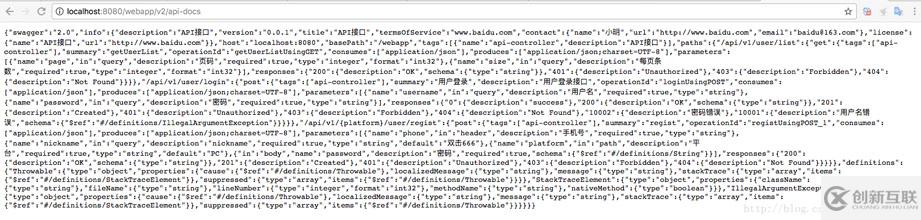
第四步:訪問/v2/api-docs
在瀏覽器上訪問http://localhost:8080/工程名稱/v2/api-docs 如果有json內容,證明正常
第五步:下載swagger-ui
從github上下載https://github.com/swagger-api/swagger-ui,注意這里要選擇下載v2.2.10(https://github.com/swagger-api/swagger-ui/tree/v2.2.10 (本地下載)),大于這個版本的集成方式不一樣。
集成方法:將v2.2.10下的dist目錄下的所有文件放到自己工程中靜態文件中,并使用下面代碼覆蓋掉index.html中的腳本部分
<script type="text/javascript">
var baseUrl = "";
$(function () {
var url = window.location.search.match(/url=([^&]+)/);
if (url && url.length > 1) {
url = decodeURIComponent(url[1]);
} else {
//上面描述的api-docs地址
url = baseUrl + "/webapp/v2/api-docs";
}
// Pre load translate...
if (window.SwaggerTranslator) {
window.SwaggerTranslator.translate();
}
window.swaggerUi = new SwaggerUi({
url: url,
validatorUrl: undefined,
dom_id: "swagger-ui-container",
supportedSubmitMethods: ['get', 'post', 'put', 'delete', 'patch'],
onComplete: function (swaggerApi, swaggerUi) {
if (typeof initOAuth == "function") {
initOAuth({
clientId: "your-client-id",
clientSecret: "your-client-secret-if-required",
realm: "your-realms",
appName: "your-app-name",
scopeSeparator: ",",
additionalQueryStringParams: {}
});
}
if (window.SwaggerTranslator) {
window.SwaggerTranslator.translate();
}
$('pre code').each(function (i, e) {
hljs.highlightBlock(e)
});
addApiKeyAuthorization();
},
onFailure: function (data) {
log("Unable to Load SwaggerUI");
},
docExpansion: "none",
jsonEditor: false,
apisSorter: "alpha",
defaultModelRendering: 'schema',
showRequestHeaders: false
});
//這里可以添加權限認證,例如token
function addApiKeyAuthorization() {
var token = "you-token";
var tokenHeader = new SwaggerClient.ApiKeyAuthorization("token", token, "header");
window.swaggerUi.api.clientAuthorizations.add("token", tokenHeader);
}
window.swaggerUi.load();
function log() {
if ('console' in window) {
console.log.apply(console, arguments);
}
}
});
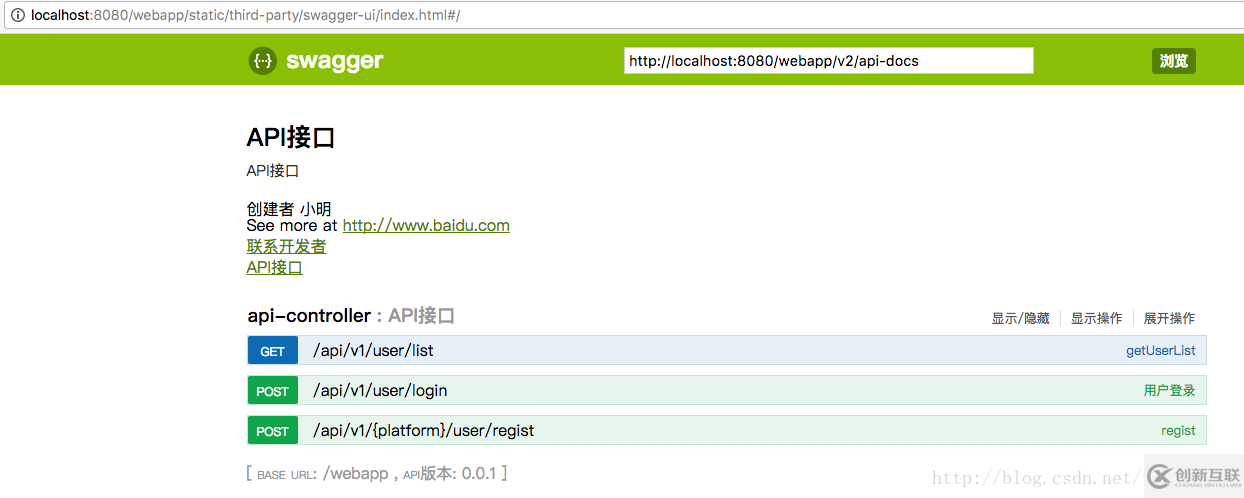
</script>第六步:訪問上面修改的那個index.html
http://localhost:8080/工程名稱/static/third-party/swagger-ui/index.html
注意:因要訪問靜態資源,使用springmvc請確保靜態資源能夠被訪問到,如果不能訪問請做如下配置:
1、 在Spring的配置文件中增加默認的servlet處理器
<!-- 過濾靜態資源 -->
<mvc:default-servlet-handler/>
2、 在web.xml中增加要過濾的靜態文件
<!-- 過濾靜態資源 -->
<servlet-mapping>
 <servlet-name>default</servlet-name>
 <url-pattern>*.js</url-pattern>
 <url-pattern>*.css</url-pattern>
 <url-pattern>/assets/*"</url-pattern>
 <url-pattern>/images/*</url-pattern>
</servlet-mapping>
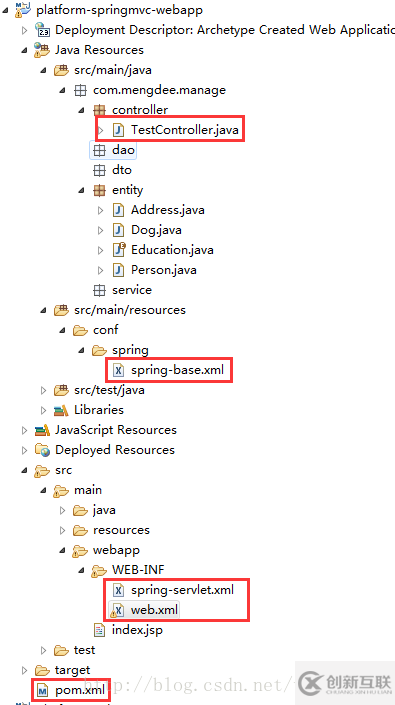
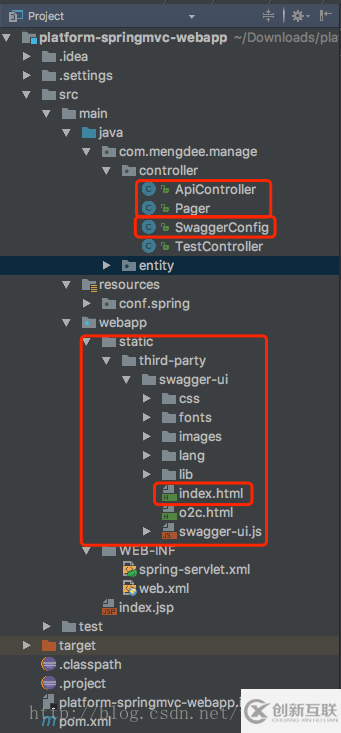
示例項目代碼結構:
完整示例Demo下載地址: http://xiazai.jb51.net/201804/yuanma/platform-springmvc-webapp(jb51.net).rar
其他
關于spring-servlet.xml 和 applicationContext.xml
SpringMVC 提供了兩種配置文件 spring-servlet.xml 、 applicationContext.xml
spring-servlet.xml 是Controller級別的,作用范圍是控制層,默認的名字是【servlet-name】-servlet.xml
默認是放在WEB-INF/目錄下,SpringMVC會自動加載,也可以在web.xml中配置它的位置
<servlet>
 <servlet-name>spring-mvc</servlet-name>
 <servlet-class>org.springframework.web.servlet.DispatcherServlet</servlet-class>
 <init-param>
 <param-name>contextConfigLocation</param-name>
 <param-value>/WEB-INF/spring-servlet.xml</param-value>
 </init-param>
 <load-on-startup>1</load-on-startup>
</servlet>
一般在spring-servlet.xml中配置一些和控制器相關的配置,如視圖解析、靜態資源文件的映射、返回結果的解析等
視圖解析
- org.springframework.web.servlet.view.UrlBasedViewResolver
- tiles3: org.springframework.web.servlet.view.tiles3.TilesConfigurer
- springMVC: org.springframework.web.servlet.view.InternalResourceViewResolver,
- shiro: org.apache.shiro.spring.security.interceptor.AuthorizationAttributeSourceAdvisor
- 上傳 org.springframework.web.multipart.commons.CommonsMultipartResolver,
靜態資源映射
<mvc:resources location="/static/" mapping="/static/**" />
<mvc:resources location="/images/" mapping="/static/**" />
<mvc:resources location="/css/" mapping="/static/**" />
<mvc:resources location="/js/" mapping="/static/**" />
<mvc:resources location="/html/" mapping="/static/**" />
<mvc:resources location="/upload/" mapping="/static/**" />
org.springframework.context.support.ResourceBundleMessageSource
返回結果的解析
- FastJson: com.alibaba.fastjson.support.spring.FastJsonHttpMessageConverter
3、applicationContext.xml 是系統級別的配置,作用范圍是系統上下文,它的初始化需要放到 web.xml 中的context-param中配置
<context-param>
 <param-name>contextConfigLocation</param-name>
 <param-value>classpath:conf/spring/spring-*.xml</param-value>
</context-param>
4、 關于applicationContxt.xml,一般是按照功能拆成多個配置文件如:
- - applicationContxt-base.xml // 基礎
- - applicationContxt-redis.xml // redis相關配置
- - applicationContxt-shiro.xml // shiro 相關配置
- - applicationContxt-dao.xml // 數據庫相關配置
- - applicationContxt-xxx.xml // xxx
總結
以上就是這篇文章的全部內容了,希望本文的內容對大家的學習或者工作具有一定的參考學習價值,如果有疑問大家可以留言交流,謝謝大家對創新互聯的支持。
網站標題:SpringMVC+FastJson+Swagger集成的完整實例教程
標題來源:http://vcdvsql.cn/article30/iigepo.html
成都網站建設公司_創新互聯,為您提供企業建站、網站收錄、外貿建站、搜索引擎優化、軟件開發、網站改版
聲明:本網站發布的內容(圖片、視頻和文字)以用戶投稿、用戶轉載內容為主,如果涉及侵權請盡快告知,我們將會在第一時間刪除。文章觀點不代表本網站立場,如需處理請聯系客服。電話:028-86922220;郵箱:631063699@qq.com。內容未經允許不得轉載,或轉載時需注明來源: 創新互聯

- 公司的外貿網站建設應考慮什么因素 2022-12-26
- 外貿網站建設需要注意什么問題 2023-03-25
- 外貿網站建設應該具備什么特點 2022-05-29
- 外貿網站建設步驟 2013-12-26
- 外貿網站建設快速獲取友情鏈接有哪些方法 2022-04-28
- 外貿網站建設要知道的幾個建站知識 2022-09-29
- 對外貿網站建設來說,最重要的是什么 2021-10-01
- 外貿網站建設注意事項 2014-05-10
- 從以下幾方面考慮外貿網站建設 2022-11-20
- 外貿網站建設需要了解的知識 2014-07-26
- 外貿網站建設有哪些流程呢 2021-08-21
- 從以下幾方面考慮外貿網站建設 2021-05-03