在CentOS中怎么搭建Git服務器-創新互聯
這篇文章主要介紹了在CentOS中怎么搭建Git服務器,具有一定借鑒價值,感興趣的朋友可以參考下,希望大家閱讀完這篇文章之后大有收獲,下面讓小編帶著大家一起了解一下。

前言
我們可以GitHub發布一些開源代碼的公共倉庫,但對于私密倉庫就需要收費了。公司內部通常會搭建自己的Git服務器,我也通過在自己的服務器上搭建練習一下。
開始前先說一下服務器信息,這里是阿里云的CentOS 6.5 64位操作系統。
一 確認服務器是否安裝Git
[root@iZ25r8k6ifuZ git]# rpm -qa git
git-1.7.1-3.el6_4.1.x86_64
這里也已經安裝過了,如果沒有安裝可以用yum install git 安裝。
二 創建git用戶
這里你可以選擇新建一個用戶來測試,也可以直接使用你的root進行以下操作。筆者也是看著資料一步一步來的,這里創建一個新用戶teslachen進行操作。
[root@iZ25r8k6ifuZ ~]# useradd tesla
[root@iZ25r8k6ifuZ ~]# passwd tesla
更改用戶 tesla 的密碼 。
新的 密碼:
無效的密碼: 它沒有包含足夠的不同字符
無效的密碼: 過于簡單
重新輸入新的 密碼:
passwd: 所有的身份驗證令牌已經成功更新。
注1:創建用戶權限不夠請加上sudo;
注2:設置用戶密碼太過簡單的話會有提示,但依舊可以設置成功。
三 生成ssh公鑰
許多 Git 服務器都使用 SSH 公鑰進行認證。 為了向 Git 服務器提供 SSH 公鑰,如果某系統用戶尚未擁有密鑰,必須事先為其生成一份。
linux 可以在本機運行ssh-keygen -t rsa生成密鑰,把.pub文件拷到服務器上。
[root@iZ25r8k6ifuZ ~]# su tesla
[tesla@iZ25r8k6ifuZ root]$ cd ~
[tesla@iZ25r8k6ifuZ ~]$ mkdir .ssh
[tesla@iZ25r8k6ifuZ ~]$ ssh-keygen -t rsa
Generating public/private rsa key pair.
Enter file in which to save the key (/home/tesla/.ssh/id_rsa):
Enter passphrase (empty for no passphrase):
Enter same passphrase again:
Your identification has been saved in /home/tesla/.ssh/id_rsa.
Your public key has been saved in /home/tesla/.ssh/id_rsa.pub.
The key fingerprint is:
13:bf:75:ba:67:7f:0e:a0:47:7a:fe:25:bc:81:85:c3 tesla@iZ25r8k6ifuZ
The key's randomart image is:
+--[ RSA 2048]----+
|     |
|     |
|  .  |
|   o . . |
|  S . E o |
|   . O |
|   + = = .|
|   + .o.|
|   o+oo+|
+-----------------+
[tesla@iZ25r8k6ifuZ ~]$ cd .ssh/
[tesla@iZ25r8k6ifuZ .ssh]$ cat id_rsa.pub >> ~/.ssh/authorized_keys
exit
四 添加tesla到sudoers文件
tesla用戶現在對一些文件夾沒有操作權限,修改/etc/sudoers文件來改變他的權限。最高管理員用戶用下面命令打開。
[root@iZ25r8k6ifuZ ~]# visudo
然后我們在vim中找到下面這行
root ALL=(ALL) ALL
按i鍵開始插入,回車一下在下面一行加上
tesla ALL=(ALL) ALL
接著按下esc鍵,輸入 :wq ,回車保存退出
五 創建Git代碼倉庫
[root@iZ25r8k6ifuZ ~]# mkdir /teslaRepo
[root@iZ25r8k6ifuZ ~]# cd /teslaRepo/
[root@iZ25r8k6ifuZ teslaRepo]# sudo mkdir teslaProject.git
[root@iZ25r8k6ifuZ teslaRepo]# chown tesla:tesla /teslaRepo/
[root@iZ25r8k6ifuZ teslaRepo]# chown -R tesla:git /teslaRepo/
[root@iZ25r8k6ifuZ teslaRepo]# cd teslaProject.git/
[root@iZ25r8k6ifuZ teslaProject.git]# sudo git --bare init
Initialized empty Git repository in /teslaRepo/teslaProject.git/
這樣一個叫teslaProject得Git倉庫就創建好了
六 本地測試使用
你可以直接在服務器上進行本地測試,也可以直接用你的電腦來測試。下面我是使用自己的MBP來進行的測試。
localhost:~ okay$ cd Desktop/git/
localhost:git okay$ mkdir teslaRepo
localhost:git okay$ cd teslaRepo/
localhost:teslaRepo okay$ git init
Initialized empty Git repository in /Users/okay/Desktop/git/teslaRepo/.git/
localhost:teslaRepo okay$ git remote add origin tesla@123.57.159.74:/teslaRepo/teslaProject.git
上面的命令在本地創建了一個文件夾并添加了服務器上的遠程倉庫
localhost:teslaRepo okay$ touch a.txt
localhost:teslaRepo okay$ git add a.txt
localhost:teslaRepo okay$ git commit -m "init commit"
[master (root-commit) d14cd3b] init commit
 1 file changed, 0 insertions(+), 0 deletions(-)
 create mode 100644 a.txt
上面的命令在本地創建了一個a.txt并在本地提交了一次
localhost:teslaRepo okay$ git push origin master
tesla@123.57.159.74's password:
Counting objects: 3, done.
Writing objects: 100% (3/3), 202 bytes | 0 bytes/s, done.
Total 3 (delta 0), reused 0 (delta 0)
To tesla@123.57.159.74:/teslaRepo/teslaProject.git
 * [new branch]  master -> master
上面的命令將本地代碼push到遠程服務器上去了,下面我們在本地clone一次看下是否正確
七 本地clone
localhost:git okay$ mkdir ttt
localhost:git okay$ cd ttt
localhost:ttt okay$ git clone tesla@123.57.159.74:/teslaRepo/teslaProject.git
Cloning into 'teslaProject'...
tesla@123.57.159.74's password:
remote: Counting objects: 3, done.
remote: Total 3 (delta 0), reused 0 (delta 0)
Receiving objects: 100% (3/3), done.
Checking connectivity... done.
clone完成,讓我們看一下文件夾目錄
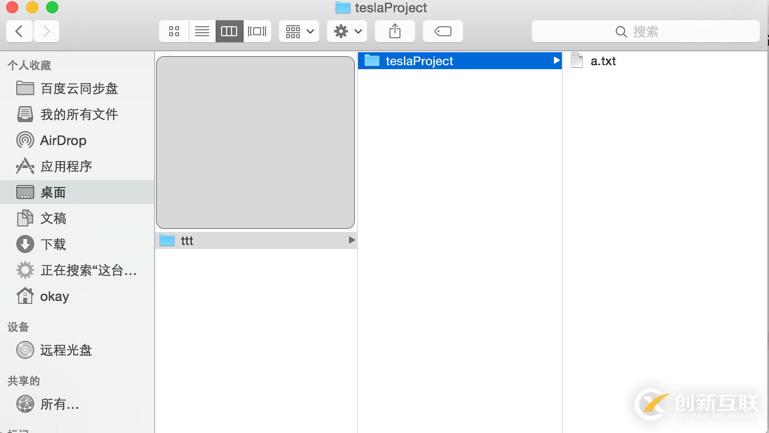
之前push到服務器上的a.txt文件已經被clone下來
------------分割線-------------
1. 查看系統用戶組
-d:指定字段的分隔符,默認的字段分隔符為“TAB”;
-f:顯示指定字段的內容;
cut -d: -f1 /etc/group
2. 查看系統用戶
cut -d: -f1 /etc/passwd
3. clone倉庫
git clone git@your_gitServer_ip:/home/gitrepo/sample.git
4. push已有倉庫
// 以master分支示范
git checkout master
git remote rm origin
git remote add origin git@your_gitServer_ip:/home/gitrepo/sample.git
git push -u origin master
感謝你能夠認真閱讀完這篇文章,希望小編分享的“在CentOS中怎么搭建Git服務器”這篇文章對大家有幫助,同時也希望大家多多支持創新互聯成都網站設計公司,關注創新互聯成都網站設計公司行業資訊頻道,更多相關知識等著你來學習!
另外有需要云服務器可以了解下創新互聯scvps.cn,海內外云服務器15元起步,三天無理由+7*72小時售后在線,公司持有idc許可證,提供“云服務器、裸金屬服務器、網站設計器、香港服務器、美國服務器、虛擬主機、免備案服務器”等云主機租用服務以及企業上云的綜合解決方案,具有“安全穩定、簡單易用、服務可用性高、性價比高”等特點與優勢,專為企業上云打造定制,能夠滿足用戶豐富、多元化的應用場景需求。
當前文章:在CentOS中怎么搭建Git服務器-創新互聯
URL標題:http://vcdvsql.cn/article20/isjco.html
成都網站建設公司_創新互聯,為您提供云服務器、網站制作、虛擬主機、網站維護、網站設計、營銷型網站建設
聲明:本網站發布的內容(圖片、視頻和文字)以用戶投稿、用戶轉載內容為主,如果涉及侵權請盡快告知,我們將會在第一時間刪除。文章觀點不代表本網站立場,如需處理請聯系客服。電話:028-86922220;郵箱:631063699@qq.com。內容未經允許不得轉載,或轉載時需注明來源: 創新互聯

- 爆紅的ChatGPT,誰會丟掉飯碗? 2023-02-20
- ChatGPT是什么 2023-02-20
- ChatGPT是什么?ChatGPT是聊天機器人嗎? 2023-05-05
- 火爆的ChatGPT,來聊聊它的熱門話題 2023-02-20
- ChatGPT的應用ChatGPT對社會的利弊影響 2023-02-20
- 馬云回國,首談ChatGPT。又是新一個風口? 2023-05-28
- ChatGPT的發展歷程 2023-02-20
- 怎樣利用chatGPT快速賺錢? 2023-05-05